
It’s Baseball Season!
With the return of our beloved Giants in an “even number year” and with the addition of a few new characters, let’s talk about some of the pro’s favorite Baseball related warm-up and strengthening exercises.
Whether or not you play, it’s always fun to look onto the field during warm-ups and test your “training” knowledge. So let’s play a round of photo-hunt and see if you can match the correct exercise to that which our favorite Giants are performing below. (Don’t worry, answers will be shown below).
Exercise #1

- “Hey everybody, it’s sunny”…to be happy
- Dynamic hug with big smiles…to open the chest and thoracic spine
- Dynamic lunge hip flexor stretch with thoracic rotation…open hips and spine
- Sleeper’s stretch… to stretch the back side of the shoulder
Exercise #2

- “Clean the wall”… to warm up your forearm
- “Sand the floor”… to warm up your hand
- “Wave the flag”… to warm up your shoulder
- “Towel Drill”… to improve follow-through mechanics
Exercise #3
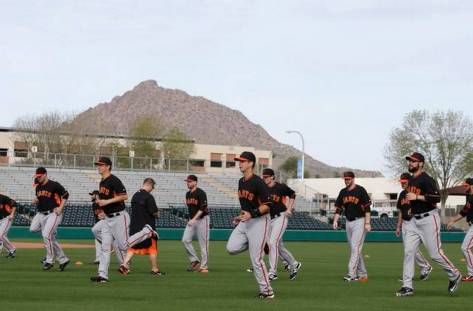
- “Buttkickers”… to warm up hamstrings
- “Walk like a Flamingo”… to practice balance
- “Jog with your teammates”… to make the fans happy
Answers:
1 (C)
2 (D)
3 (A)
The Kids are going to be Upright
This picture should look familiar…it was the evenly spaced grid pattern you saw every morning growing up walking into class. This space personified structure, QUIET, and organization. However, it also facilitated some note passing and a good nap once in a while. While this model worked for us, things are looking UP for the next generation.

If you know one thing about pediatrics, it is that they like to move. Teachers and parents have spent an enormous amount of energy trying to get their kids to settle down and pay attention. Workstation design is evolving to help in this process, by letting kids sit…stand…move…without compromising the learning process. Organizations like Standup Kids and Stand2learn are leading the charge to improve pediatric health.
Here are some statistics from the website (http://standupkids.org/our-mission/):
- The average U.S. student is sitting an average of 4.5 hours/day at school and (for kids ages 8-18) an additional 7 plus hours/day in front of a screen, regardless of socioeconomic status. Combine that with time spent doing homework, sitting at the dinner table, and driving to and from school, and our kids are spending nearly 85% of their waking hours in sedentary positions.
- The problem is so bad that medical experts now equate sitting with smoking, saying that sitting as little as two hours continuously increases risk for heart disease, diabetes, metabolic syndrome, cancer, back and neck pain (among other orthopedic problems) and will literally shorten your life, just like smoking.
- It turns out that tacking on regular exercise (soccer practice, gymnastics class, etc.) to an otherwise sedentary life doesn’t overcome the negative effects of too much sitting. Accordingly, we must create ways for children to be continually moving more throughout the day.

Still not convinced? Maybe you are resistant to change? How about if I told you that studies have also shown boosts in cognitive development and academic achievement:
Worksite Health Promoto: Sit, Stand, Learn
Neurocognitive Benefits of Stand-Biased School Desks
Here are some kid-centered designs to check out:


So lets spread the word…because healthy kids make healthy adults!

Get Fit For 2016!
The New Year is just around the corner and those pesky New Year’s resolutions are coming up. Improving fitness is a common resolution, however this can be challenging for people who simply do not enjoy exercise.
Fret not! The current physical activity guidelines for Americans are 150 minutes of moderate-intensity activity each week1, which equate to 30 minutes 5 days a week. This can be broken down further to three 10 minute bouts of activity. Exercise does not necessarily mean an exercise class or gym workout, but anything that requires movement and gets the blood pumping.
Here are some tips for people who are not cut out for the gym routine:
Simply walk! Walking is tolerable for most people, easily accessible and does not incur extra costs other than a decent pair of walking shoes.
Dance! Zumba is a great way to get fit but does requires a class setting. If this still smacks too much of that dreaded exercise, try taking ballroom or swing dancing classes or just turn on your favorite tunes and move to them for 10 minutes.
Gardening. Did you ever think that pulling weeds and planting flowers would fall into the exercise category? Absolutely! It requires movement and can elevate your heart rate, depending on the activity.
Housework. For those of you who don’t mind a little cleaning, here is the perfect opportunity to keep the house visitor friendly. Setting up a schedule that entails more vigorous activities each day (ie: vacuuming, scrubbing) can help you meet some of your daily activity requirements.
Mix it up so you don’t get bored. The body is very adaptable—adding variety to your activities will maximize the benefits.
If you have aches and pains that hinder you from performing activities you would otherwise enjoy doing, consider speaking with your doctor about it – you may benefit from a physical therapy consultation.
Pregnancy Pain!
You’re pregnant, “Congratulations” on your expected little one! What an exciting and busy time — its a shame that pain has to slow you down. You’re not alone, however, 24-90% of pregnant women experience lumbopelvic pain during their pregnancy, which is a broad term for either pelvic girdle or low back pain. For most women, the pain will go away after they give birth, but one-third of women may still have pain 1 year after delivering. Many women decide to seek medical help during weeks 34-40 of pregnancy, and many OB’s will refer them to Physical Therapy.
What can Physical Therapy offer? Treatment may include: exercise, eduction, manual therapy, bracing, and/or a combination of the above. Exercise can decrease pain, reduce sick-leave (for pregnancy related low back and pelvic girdle pain), and improve overall function. The best exercises are ones that strengthen the spinal muscles (AKA core strengthening) and the pelvic floor muscles. Water aerobics, general strength training, endurance exercises (walking, swimming), and balance work are also effective. If you are experiencing pregnancy related pain a Physical Therapist can help tailor a program specifically for you, and they may determine if other treatments such as bracing or manual therapy, may be helpful.
Try these exercises at home:
BRIDGING:
– Lift your buns in the air (not too high)


TRANSVERSUS ABDOMINIS:
– Tighten your tummy muscles like you are hugging your baby with your abdominals
– Try to keep your hips and back still, movement only with the abdomen
– It’s easiest to start laying on your back in a comfortable position, but you can do these sitting, standing, or laying down

KEGELS:
– Pretend like you are stopping a flow of urine and hold your pelvic floor muscles for at least 5 seconds
– You can do these in any position and nobody will know!
PELVIC TILT:
– Take the small of your back and gently press it down to the floor below you

BIRD DOG:
– Kneeling on all 4’s, extend your opposite arm and leg (you may want to start with legs only)


How many should I do, and for how long?
You can start with 5 repetitions of each exercise, holding for 5 seconds, 5 times per day
OTHER HELPFUL TIPS:
– Change position every 20 minutes: if sitting, stand up — if standing, sit down
– Don’t cross your legs while sitting — maintain good, upright posture!
– Wear comfortable shoes without a heel
– Invest in a pregnancy pillow and sleep on your side hugging the pillow with your knees: Leachco’s Snoogle and Back ‘n Belly are popular (http://leachco.stores.yahoo.net/formom.html)
– Consider a maternity belt: ‘Gabrialla’ makes elastic supports

Doctors Discuss Knee Pain
Options for Aging & Aching Knees
Knee problems like arthritis, meniscus tears or ligament damage can worsen as you age. Join us for an evening of expert advice and Q&A discussion with CPMC orthopedic specialists.
Topics covered include:
- Tips for Maintaining Healthy Knees | Christian Guier, MD
- New Approaches to Knee Pain: Stems Cells & PRP | Lesley Anderson, MD
- Non-Replacement Options for Knee Arthritis | Robert Purchase, MD
- Total Knee Replacement: When Is It Time? | Robert Mayle, MD
- Moderated by I John Belzer, MD., chief of orthopedic surgery, CPMC
Event Information:
WHEN: Tuesday, September 30, 6:30-8:00 pm
Doors open & refreshments served at 6:15
WHERE: Holiday Inn Golden Gateway Redwood Room, Lower Lobby
1500 Van Ness Avenue, San Francisco
COST: Free but registration is required.

Low back pain: why and what to do about it
by Thommy Chui, PT, OCS, CSCS, TPI CGFI MP2
What does it mean when someone says I threw my back out? Was it spring cleaning and this person decided, I don’t want it anymore?
As a Physical therapist, all too often I hear the phrase” I threw my back out”, followed by… “all I’ve done for the last week is lie down, take pain medication, and rest. I didn’t want to make it worse.”
Our human anatomy and physiology was developed to move, however our increasingly sedentary work duties and lifestyles have done quite the opposite. Whether it’s sitting watching TV, sitting in front of a computer station for hours without breaks, sitting in meetings , or traveling by car or airplane to then sit in meetings, we just aren’t moving as much anymore.
Studies have shown that prolonged sitting can contribute to decreased disc height in our lower back. Additionally, extensive sitting produces overly tight hip muscles and weakness in the low back and gluteal muscles. The result is an imbalance in our core stability.
The most common non-traumatic ways in which people injure their lower back is by bending, standing from a chair, turning or twisting. This is when we “throw our backs out.” What does this mean? It means that since we have an imbalance in our core stabilization, our muscles are not working in harmony. Specific muscles around our spine end up compensating and can progressively become overworked, setting the stage for injury. The pain we feel initially is usually tension or spasms of these overworked muscles. Remember the root of the problem is weakness and inadequate stability caused by not moving enough.—so the last thing you should to do when your back is sore or in pain is lie down and not move!
Research shows that continued mobility in pain free ranges in combination with modification of activities helps decrease pain significantly.
Below are some recommendations for strength and mobility exercises along with safe techniques for getting in/out of bed and standing up from chairs without exacerbating your back pain. Try these the next time you have back pain and it may help avoid a trip to your doctor’s office.
LOG ROLL (4 steps):


HIP HINGE

SIT-STAND (SQUAT)

LUMBAR ROTATION, TRUNK ROTATION


FRONT PLANK

SIDE PLANK

BRIDGE

References:
– O’sullivan, K et al. “Lumbar posture and trunk muscle activation during a typing task when sitting on a novel dynamic ergonomic chair.” Ergonomics. 2012;55(12):1586-95. doi: 10.1080/00140139.2012.721521. Epub 2012 Sep 25.
– Zemp, R “In vivo spinal posture during upright and reclined sitting in an office chair.” Biomed Res Int. 2013;2013:916045. doi: 10.1155/2013/916045. Epub 2013 Sep 24.
– Lee SH, et al “The change of whole lumbar segmental motion according to the mobility of degenerated disc in the lower lumbar spine: a kinetic MRI study.” Eur Spine J. 2014 Mar 28.
– Kline JB et al. “Core strength training using a combination of home exercises and a dynamic sling system for the management of low back pain in pre-professional ballet dancers: a case series.”J Dance Med Sci. 2013;17(1):24-33.

Sports Wellness Center
by Natalie Wong, PT, OCS
CPMC Physical Therapy and Sports Wellness Center
In 2007, California Pacific Medical Center (CPMC) Physical Therapy Department started the Sports Wellness Program to bridge the gap between medically necessary therapy services and community based wellness and fitness programs. With the growing number of active individuals in the Bay Area, life spans expanding, and the desire to make a more lasting change with our patients, the PT department began offering a range of wellness programs taught by therapists that are available to employees and the public. With the medical and fitness expertise of the physical therapy team, we keep you fit in the safest way possible.
Below are brief descriptions of what we have to offer.
- Total Body Fitness – An effective 60-minute cardio and strength workout for those trying to prevent injuries and stay healthy. We provide a Level I and II class.
- Fit for Life – A class designed for people 60 years or older to help them increase strength and flexibility, improving their balance and reducing their risk of falls. This overwhelmingly successful class helps keep participants healthy and independent.
- Pilates – Our Pilates Mat Class and Private Pilates Reformer sessions are taught by Physical Therapists with Pilates certifications.
- Bike Fit –Are you fit to ride? Our Fit to Ride Program offers two bike-fit options.
- Option 1: A musculoskeletal assessment with a bike-fit evaluation with you seated on your bike that is secured to the bike-fit trainer.
- Option 2: In addition to the bike-fit evaluation and musculoskeletal assessment, this option includes an interactive cycling video analysis to optimize your comfort, efficiency, speed and overall cycling performance.
- Running – CPMC’s Running Clinic will help you improve running mechanics to optimize biomechanical efficiency and endurance; improve posture, flexibility, strength, and balance; minimize repetitive joint stress and prevent injury; identify common running training errors; and provide skilled exercise program instruction and feedback.
- Alter G Treadmill – Do you want to return to running or start a running or walking program but afraid you are too overweight or injury prone? The anti-gravity treadmill is a technology that unloads you so you can walk/run with an adjusted body weight.
- Golf Conditioning – Are you ready to get back on the golf course or improve your game? Private sessions are with physical therapists who are (Titleist) TPI certified.
- Fitness Training – What are your fitness goals? To prevent injury? Stay healthy? Lost weight? Exercise during pregnancy? Our private sessions with a Physical Therapist will tailor an exercise program to meet your needs. CPMC employee discount available.
For more information about the Wellness staff or see a list of our programs, please check out our website at www.cpmc.org/sportswellness.
We are located at:
Outpatient Physical Therapy – Pacific Campus
2360 Clay Street
San Francisco, CA 94115

CADENCE: HOW YOUR RHYTHM CAN AFFECT YOUR RUNNING
by Jonathan Ide-Don, PT, DPT, OCS
WHAT IS CADENCE?
Cadence is the number of steps (or strides) a runner takes in a set amount of time. It is often expressed in steps per minute (each foot hitting the ground counts as one step) or strides per minute (one cycle of right foot then left foot hitting the ground counts as one stride). Other names for cadence include step rate, step frequency, and turnover. Cadence is also one component that determines running speed:
Cadence X Step Length = Speed
WHY IS IT IMPORTANT?
Cadence is one of the key factors affecting running mechanics. If a runner maintains a constant speed, but increases their cadence, their step length will shorten as well. A shorter step length and faster cadence can have effects on muscle activation patterns, joint loading, and the overall movement patterns.
Cadence is one factor that is under conscious control of the runner, and short-term changes can be seen immediately with easily accessible tools or cues. Making long-term changes stick will require practice over a period of weeks to months.
WHAT DOES THE RESEARCH SAY ABOUT CADENCE?
Key points from the research:
Running with a quicker cadence results in the following:
- Shorter step length (Fletcher 2010)
- Less vertical displacement
- Shorter stance time
- Better shock attenuation (Hamill 1995)
- Less energy absorption at knee (Heiderscheit 2011)
- Less energy absorption at hip
- Less braking as the foot hits the ground
- Increased gluteal activation (Chumanov 2012)
WHAT DO THE COACHES SAY?
There appears to be a general consensus that a minimum of 170 to 180 steps per minute is a good cadence to shoot for. Pose running teaches at least 180 steps per minute, but faster if the athlete is able to perform the proper technique. Chi running also teaches an ideal cadence of 180 steps per minute. Blaise Dubois, a physiotherapist based in Quebec City, also advocates a cadence of at least 170 steps per minute. He recommends increasing the cadence to 180-185+ steps per minute for faster workouts.
WHAT DOES THIS ALL MEAN?
- Increasing cadence lessens forces at the knee and hip joints
- Increasing cadence lessens risk of stress fractures associated with repeated, excessive loading of the bone
- Increasing cadence increases gluteal activation, which may positively affect alignment of your knees, ankles, and feet during running
If you are looking to prevent future injuries, or to return to running following an overuse injury, increasing your cadence 10% over your preferred cadence may be beneficial.
A specific target for your cadence is largely dependent upon the individual. However, shooting for at least 170-180 steps per minute may be a good place to start.
HOW DO YOU DO IT?
1. Running intervals with a metronome
If you have a smartphone, you can download free or really cheap metronome apps onto your phone. As part of your warm up, run for 30 to 60 seconds with the metronome matching your footsteps to the metronome beat, rest for 1 minute, and repeat 3 to 5 times. Then shut off the metronome, and go out for your run and try to maintain your goal cadence. My personal favorite is the Steinway & Sons free app for the iPhone:
https://itunes.apple.com/us/app/steinway-metronome/id393021343
2. Running with music with specific beats per minute
Build a playlist! Running with music can make some runners feel like they are working less hard to maintain a certain speed (Bood 2013). Even better, the music can serve as your metronome. Check out the websites below to search and find songs to build a playlist at different cadences:
http://www.cs.ubc.ca/~davet/music/bpm/
http://www.bpmdatabase.com/search.php
http://runningplaylist.net/category/bpm-2/page/2/
3. Running drills with a metronome
These drills are excellent technique drills as part of your warm up. Using a metronome while practicing the drills is a great way to practice the rhythm of running at a faster cadence. Try each drill 3 times each for 30 seconds, matching your footsteps to the metronome beat.
https://ptsportswellness.wordpress.com/2013/12/04/running-drills-the-quick-switch/
https://ptsportswellness.wordpress.com/2013/12/04/running-drills-modified-butt-kicks/
https://ptsportswellness.wordpress.com/2013/12/04/running-drills-modified-butt-kicks-moving-forward/
4. Jump rope
Practice jumping rope with both feet hitting the ground with a quick, light hop. Jump rope is a great way to teach your body how to quickly get your feet on and off the ground. Progress from 2 feet jumps to alternating right foot / left foot jumps. Focus on quickly picking the heel straight up toward your sit bone, hopping just high enough off the ground to clear the rope. 30-60 seconds of jumping with 30-60 seconds of rest for 5-10 rounds is a great way to start.
5. Use mental imagery
For those runners who work best with a mental image, some of my favorite cues I have heard are “run like you are running on hot coals,” “Hot feet,” or “run like you are running on thin ice.” Try different mental cues, and find the one that works for you the best.
SOME CAVEATS
1. Keep your speed constant.
Some runners who have tried to increase their cadence told me that their tendency is to just want to run faster. This point is valid, because as running speed increases, running cadence tends to increase as well. The challenge is can you run at a constant speed, but increase your cadence? Running on a track, treadmill, or straight flat pathway with distances marked can help you control your pace while learning the faster cadence.
2. Practice, practice, practice… and be patient!
A running course I recently attended recommended 6 weeks of running homework with drills 3 days per week, which included a lot of metronome drills. It takes a long time to make permanent changes in your running cadence, as your body likely has “overlearned” its preferred cadence.
REFERENCES
Fletcher et al. Biomechanical performance factors in pose running and heel-toe running. International quarterly of sport science 2010/2012.
Chumanov et al. Changes in muscle activation patterns when running step rate is increased. Gait and posture. (36): 231-235, 2011.
Bood et al. The power of auditory-motor synchronization in sports: enhancing running performance by coupling cadence with the right beats. PLOS ONE. 8(8): 1-8, 2013.
Heiderscheit et al. Effects of step rate manipulation on joint mechanics during running. Medicine and science in sports and exercise. 43(2): 296-302, 2011.
Hamill et al. Shock attenuation and stride frequency during running. Human Movement Science. 14(1): 45-60, 1995.
Romanov, N. (2004). Pose Method of Running. USA: Pose Tech Press.

Running Drills: Forward Fall into Run
by Jonathan Ide-Don, PT, DPT, OCS
The primary goals for this drill:
-
Learn how to fall forward while placing your foot underneath your body
-
Learn how to take short, quick strides
How:
This drill will train your body how to transition from standing still, to leaning forward, to running forward while maintaining short, quick strides.
Start by standing with both feet on the ground in tall posture with both knees slightly bent. Pull one heel straight up to the buttock, and balance on one foot with arms in running position. Shift your weight forward and lean forward gradually. Once you feel at the edge of your balance, quickly switch your feet by pulling the heel of your other foot straight up to your buttock. Continue leaning forward as you run, focusing on keeping your strides short and quick with your foot landing softly underneath your hips.
COMMON MISTAKES
- Reaching your foot out in front of your body as you fall forward rather than quickly pulling the heel up to your buttock behind you
- Landing hard on your heel , rather than softly landing with your foot underneath your hips
- Losing your forward lean as you start to run
